I wrote an earlier post about preparing to build a playhouse for my kids. This summer, I began construction on it.
During the cooler months earlier this year, I finished making some designs to use for planning and building. I already had an idea of what I wanted. I did some searching around on the Internet to find other ideas to get what I wanted. Since I live in an area that gets a fair amount of snow, I needed to make sure the roof was going to be able to hold a snow load. The roof pitch I found people suggesting for snow was a 3:12 pitch. I used this to help with the dimensions based on the area I had prepared in the backyard. I also looked up in our city’s building codes to make sure I wouldn’t need a building permit. According to their website, anything under 200 sq feet would not need a building permit. I had to make sure the design would fit within that number.
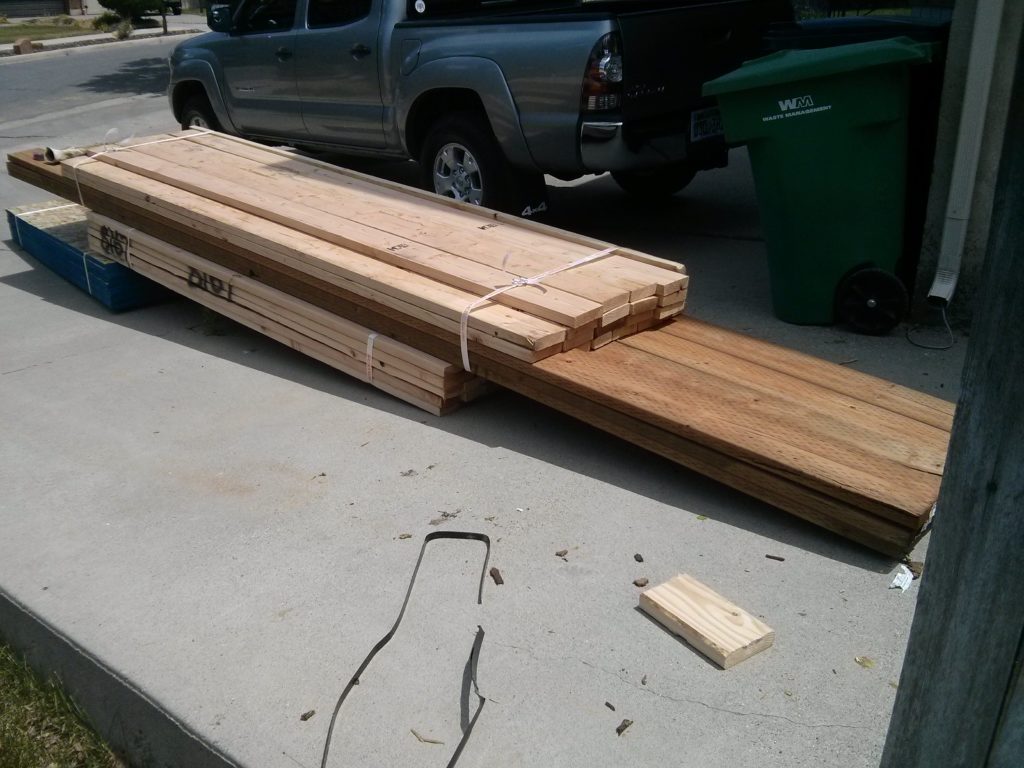
I took two semesters of an AutoCAD class when I was in college. I was able to find a free and open source computer aided design program (LibreCAD) so I could draw some building plans(treehouse-plans-PDF). Once I had some different views drawn, I was able to come up with a list of lumber that I would need. Since it was a decent amount of lumber that I was getting all at once, I had the lumber yard deliver it to my house. My little Nissan Versa couldn’t carry much at one time.
I called the utility location service to come an mark the underground utilities. It was not an encouraging layout as it had things running directly under where I planned to put the playhouse. I went ahead and layed out where I wanted my poles to go and began digging. As I got deeper, I used a hand trowel as I didn’t want to cut into something I would regret. I did not have a lot of experience with laying things out for digging and keeping them square. This showed once I got further along in the construction as not everything lined up as I had expected. If I were to do this again, I would have figured out how to do more to make sure my poles were measured more accurately.
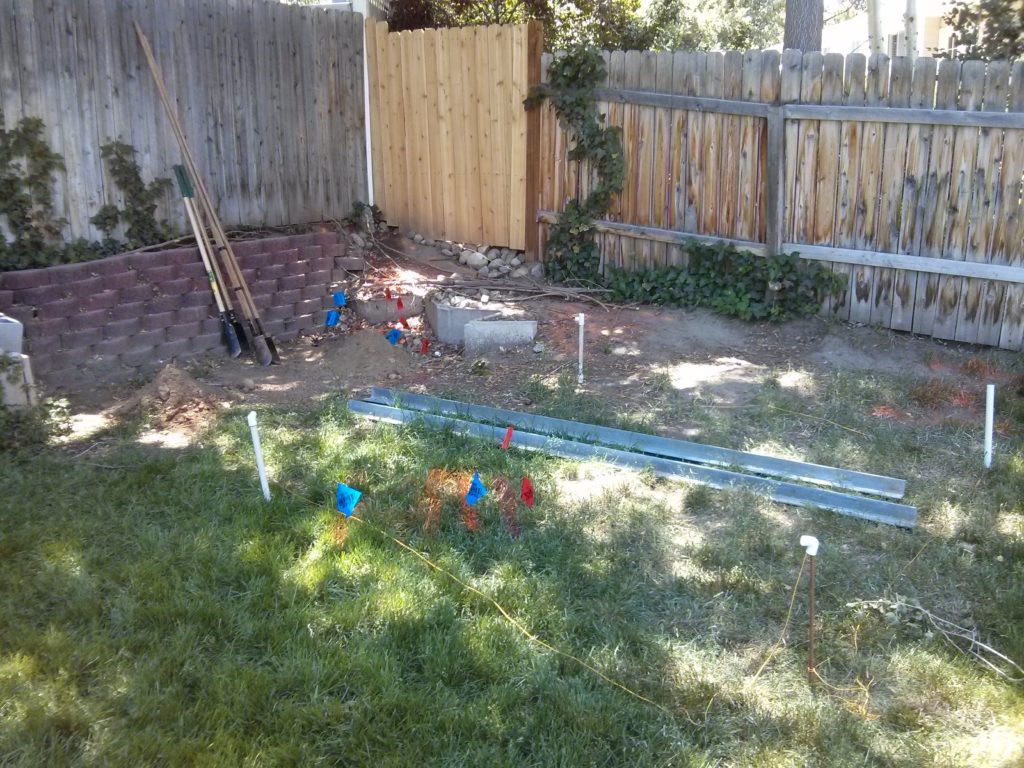
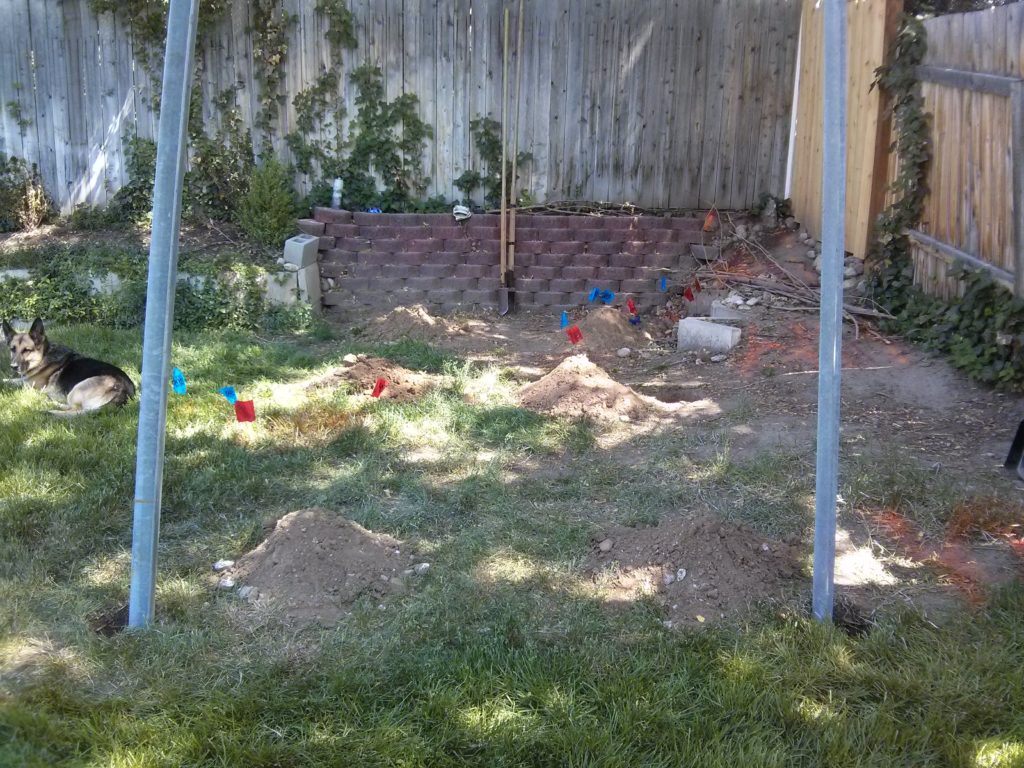
By the time I had the lumber delivered, I had the holes dug for the poles. I decided to go with a two foot depth. Unfortunately, I wasn’t aware of how to place a pole without it being buried in the ground. Now I know about a bracket you can buy that lets you pour concrete and set the bracket in the concrete. The bracket sits on top of the poured concrete so that you can place the pole in the bracket to be secured. This gives the added advantage of keeping the pole out of the ground, preventing rotting of the wood. Since I wasn’t aware of this method, the poles I used are pressure treated 6×6’s. I bought some water proofing stuff used for the exterior walls for basements. It was a runny, black, tar type substance. I painted it on the bottom of the poles where they would be underground with the hope that this would keep the water out of the wood.
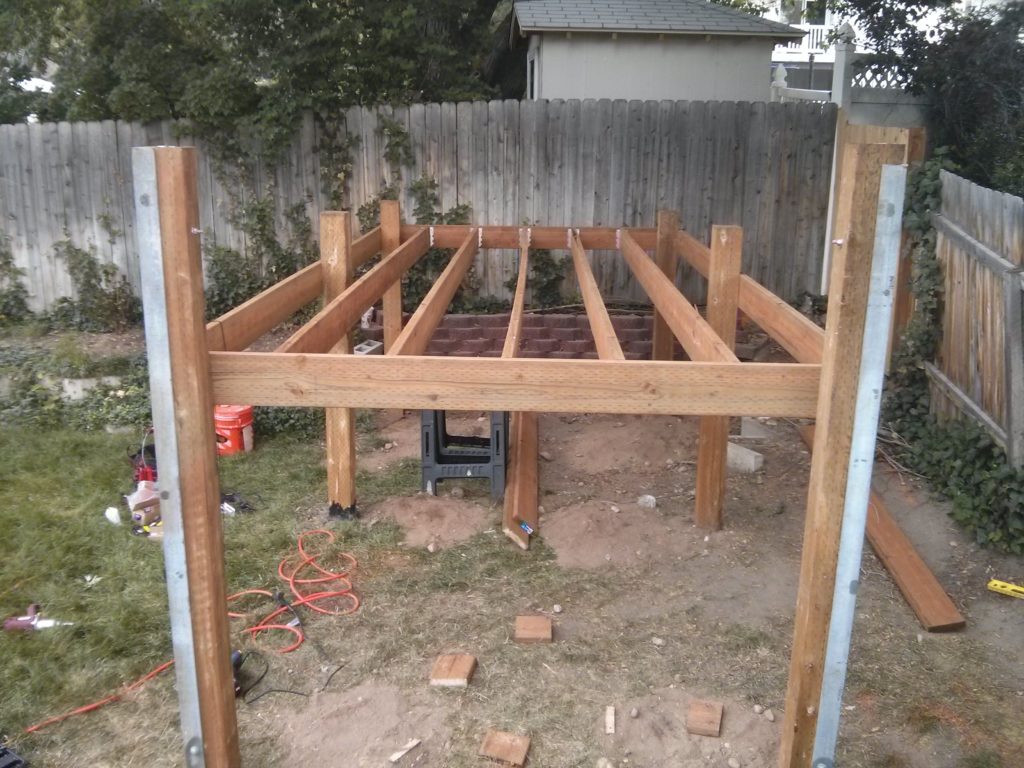
Since I wasn’t very good at squaring up the poles, I used the lumber I was going to be attaching to the poles to help with getting things square before I poured the concrete into the holes.
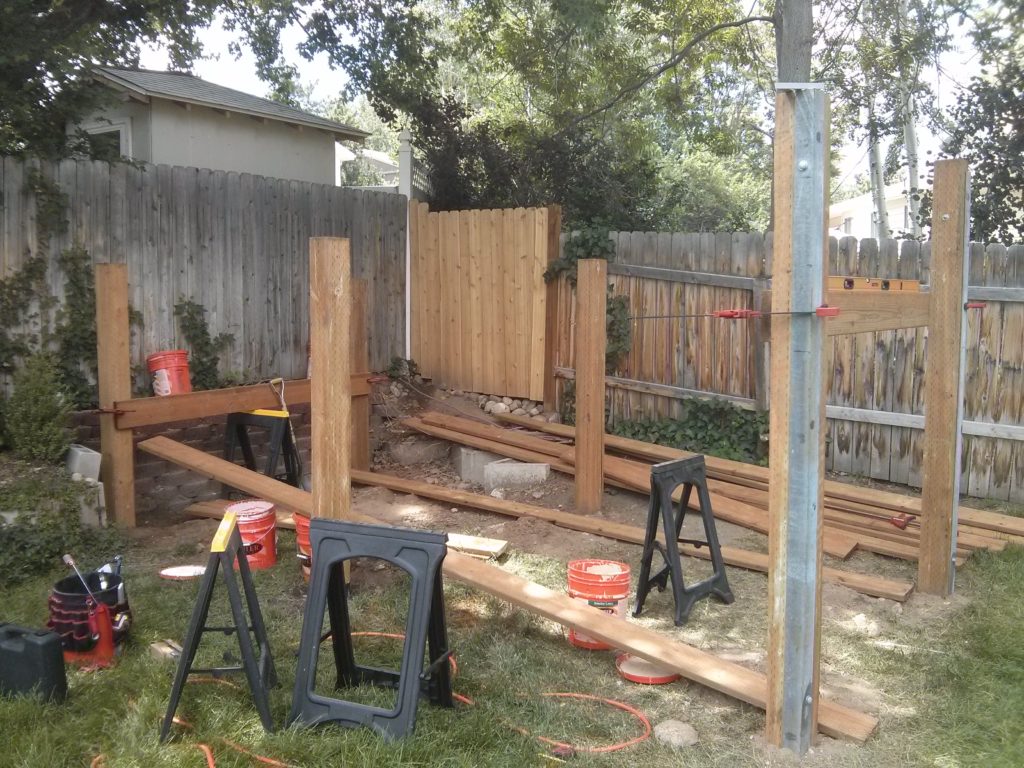
The angle iron shown on the front two poles was acquired by my father when he was working on a construction site. They were part of a tower for an antenna that was being dismantled. They are 1/4 in galvanized angle iron. These two pieces were sunk into the ground. Holes were drilled into the angle iron so I could attach them to the wooden poles with carriage bolts. I chose to do this as this part of the treehouse had the potential to bear a shock load. The wall here in the future is going to be a climbing wall with the potential of having a zipline attached to this side as well. Probably over engineered, but I was OK with it.
After the poles were set, I began construction of the frame for the platform base. I used pressure treated 2×8’s with the floor joists on 16 in centers. I used lag screws to attach the frame to the poles and joist hangers to secure the joists to the outer frame. I then placed more lag screws on the ends of the joists to further secure them to the frame.
Once the frame for the platform was made, I put OSB on top of it to make the floor. This is when I started to realize that the poles were not placed exactly like I had thought they were. The idea was that two 4×8 ft pieces of OSB placed side by side would cover the floor from edge to edge of the frame. The frame wound up being larger than that. I had to make it work though.
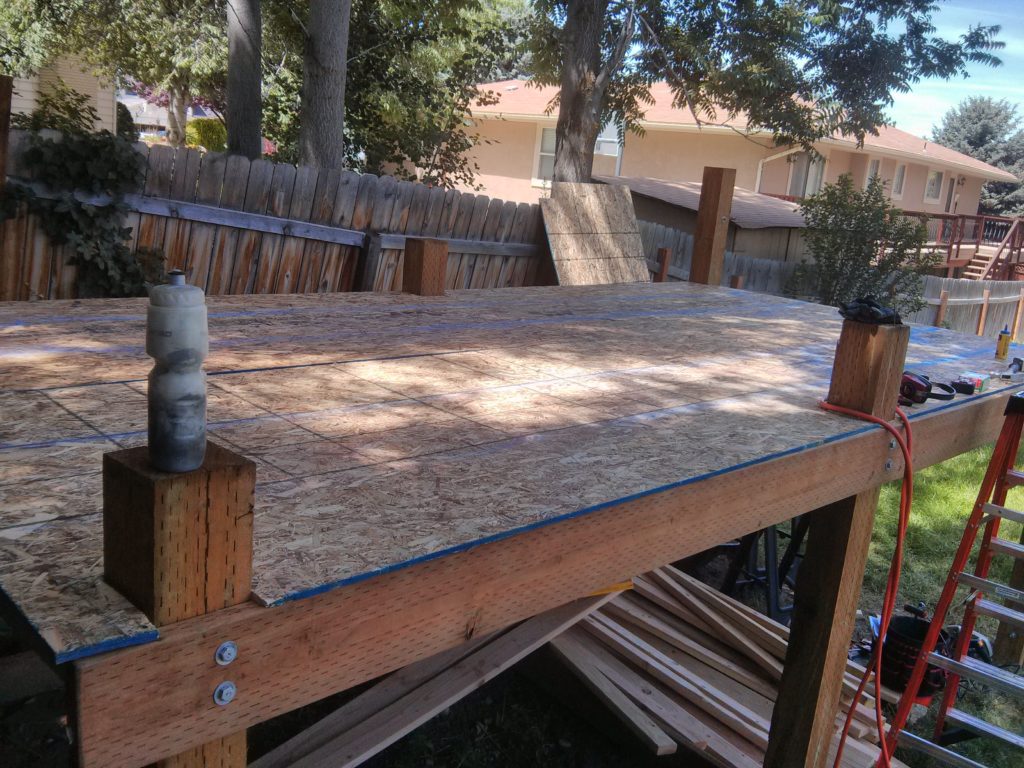
At this point I went ahead and started marking out my bottom plates for the walls. I began to realize that the dimensions I had drawn on the computer were not going to be the same ones that were in real life.
For some reason, I decided to start with building the back wall. I believe my reasoning was that since it was the smallest wall, I wanted to make sure I was going to be able to raise the wall myself. The house I helped to build in AmeriCorps was a 2 story house. We started the 2nd story of construction. All of the walls were built up on the floor of the second story. I decided on the same strategy of framing the walls up on the platform and then raising them. Unfortunately, when I framed the back wall, I forgot to nail the OSB on it before I secured it. But I was able to later get that on.
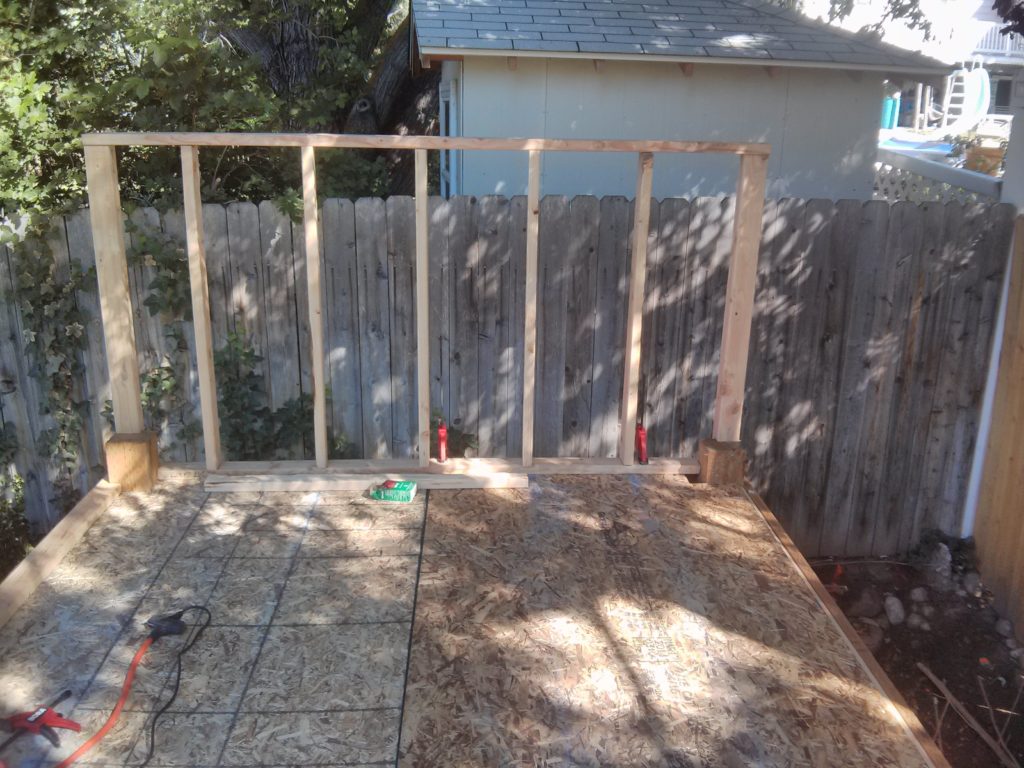
The next step was to begin framing the large front wall. It was going to be the largest section for me to raise.
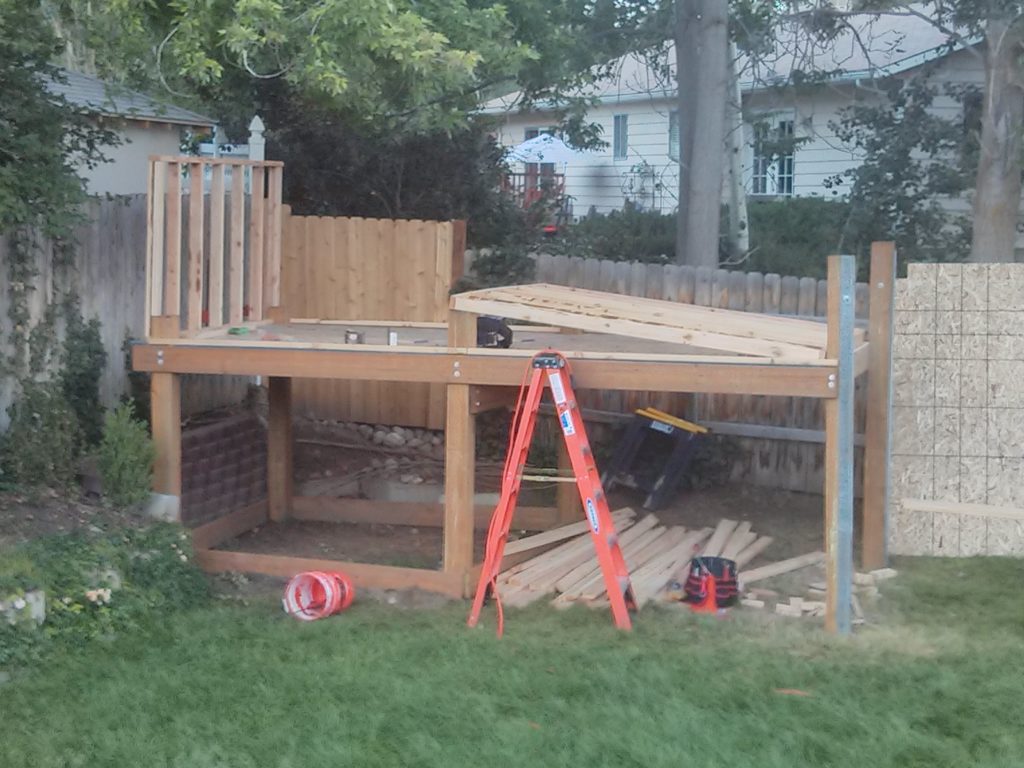
I decided to go buy some heavy plywood for covering the front wall. I have plans to make this a climbing wall and I wanted to make sure it was going to be strong enough to hold the hand holds that will be put on it some day. I also decided to use an adhesive to attach the plywood to the framed wall. I then used screws instead of nails to further secure it. It was pretty heavy to raise by myself, but once it was up there my trusty clamps once again saved the day. This project could have never been done on my own without my clamps which a friend of mine gave me as a wedding gift.
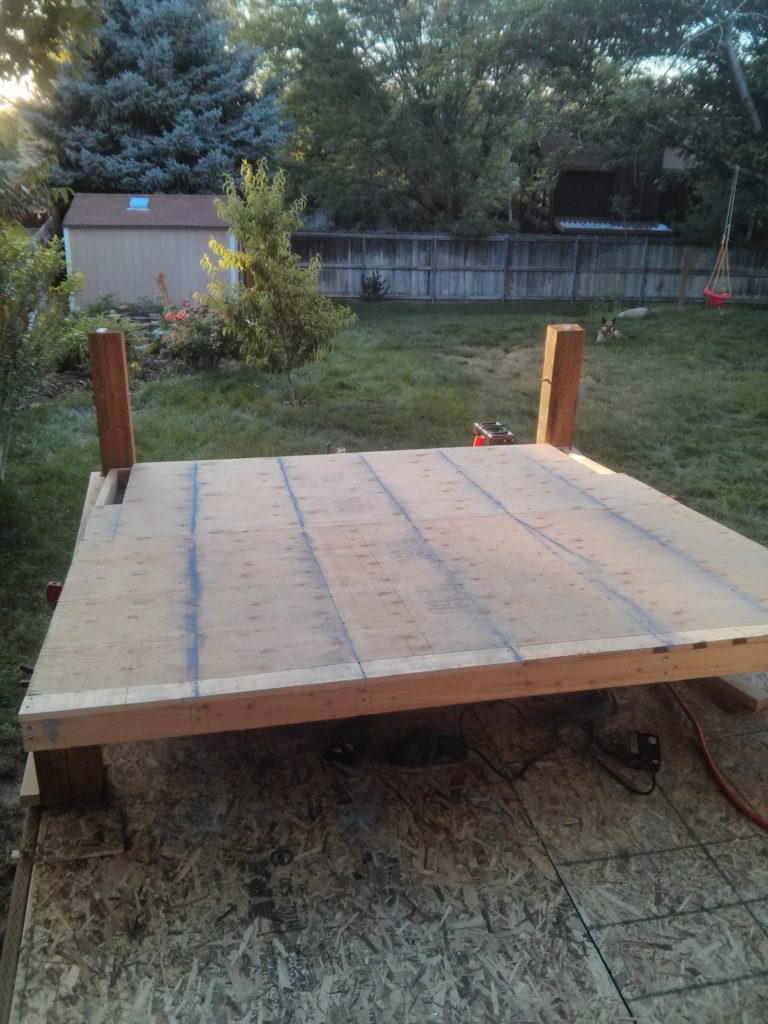
I also added blocking between the studs to give more support. I added some metal brackets to secure the front wall even more. There are high winds that come through here. Being the biggest target, I wanted to make sure this wall had the best chance it could have of staying put.
The next step was to begin the south side wall. This is where using CAD software really came in handy for me. since the wall had an angle to it, each stud was going to be a different height. I used the software to offset studs down the wall at 16 in. intervals. I then trimmed each stud using the top plate as the end of the line. I dimensioned the drawing, dimensioning each stud so I could know how long to cut the studs. I knew what angle to cut the tops of the studs because I had a 3:12 or 1:4 roof pitch. It actually turned out better than I was expecting. It wasn’t perfect, but I was pleased with it. I decided to build the side walls in two sections as the 2×4’s I had for the top and bottom plates were not going to be long enough to stretch the whole length.
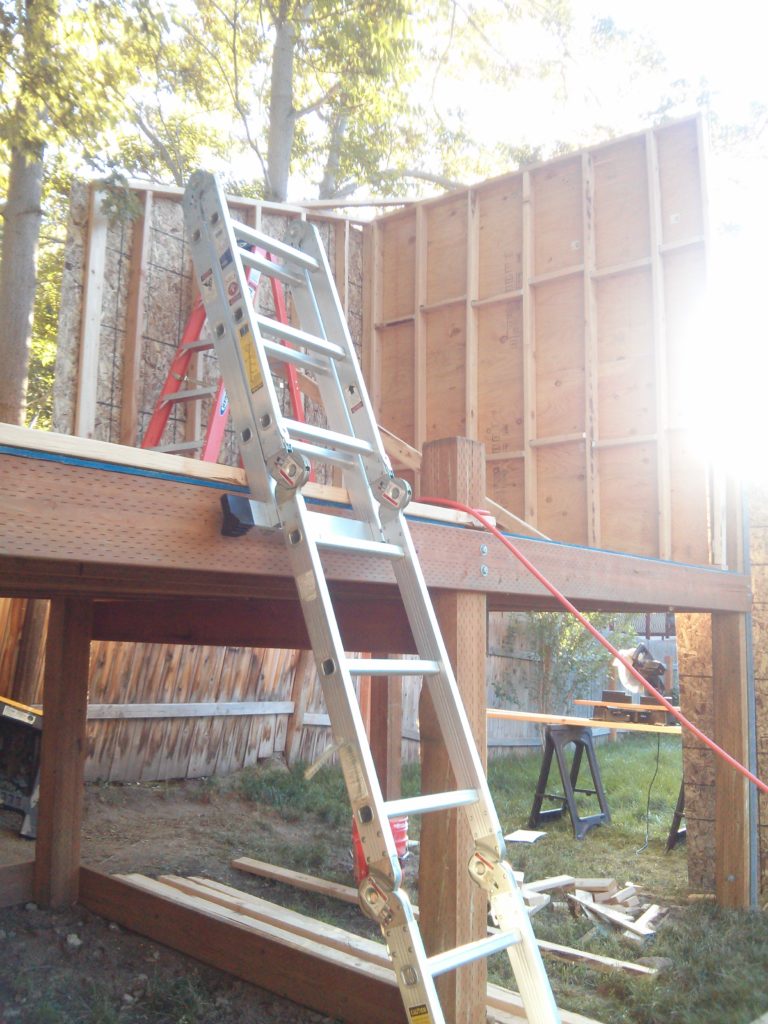
The second section of the south wall was built the same way. However it wasn’t so straightforward in joining them together. So far, what I did has held up so far.
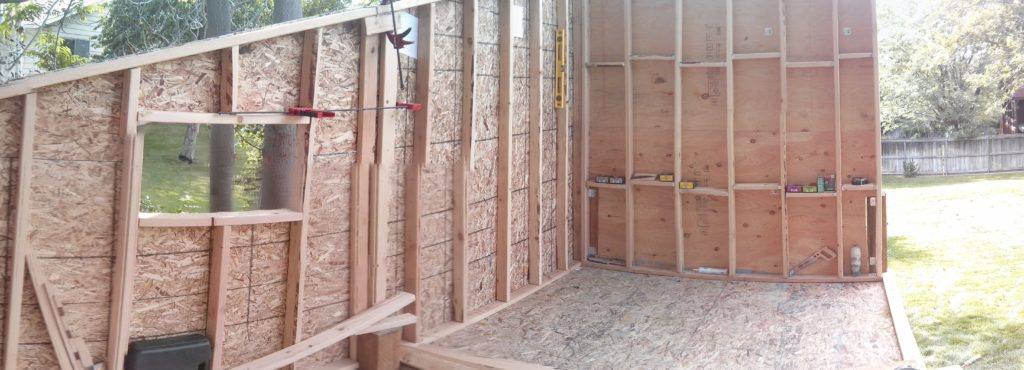
The north wall was also built in two sections. This was also the final wall, which would close me in as it was where I was using my ladder for egress. Before I built it, I had to make sure I had decided on how I wanted my door to work. I decided to go with outward swinging. I also had to decide on how large I wanted the door. The window on the north wall is directly across from the window on the south wall and the same dimensions.
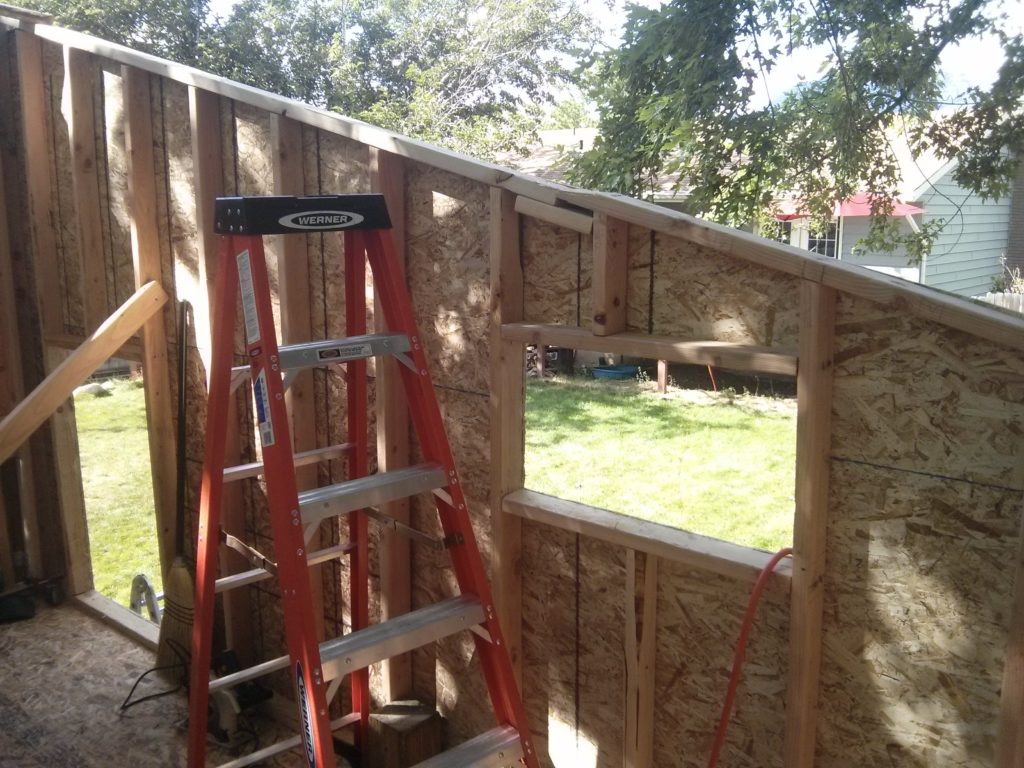
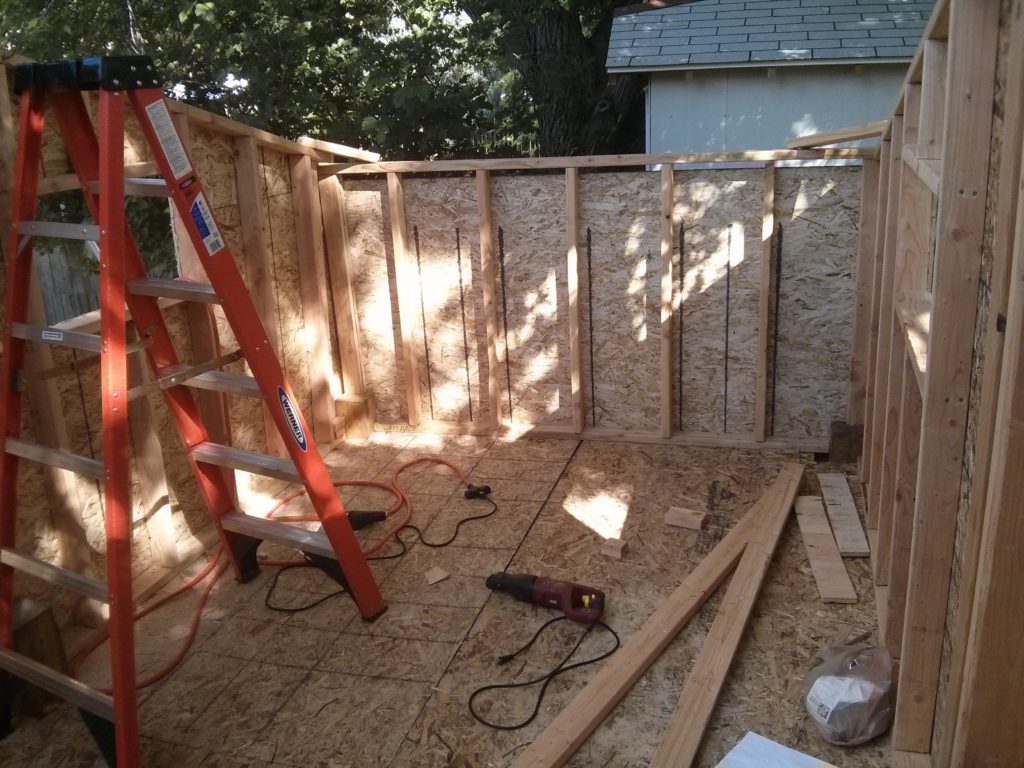
At this point all the walls are up. The platform is enclosed and the next step will be building the ceiling joists. The walls are a little shaky, but I made efforts to make sure the walls will stay up. Tieing them all in with the roof will help secure them.
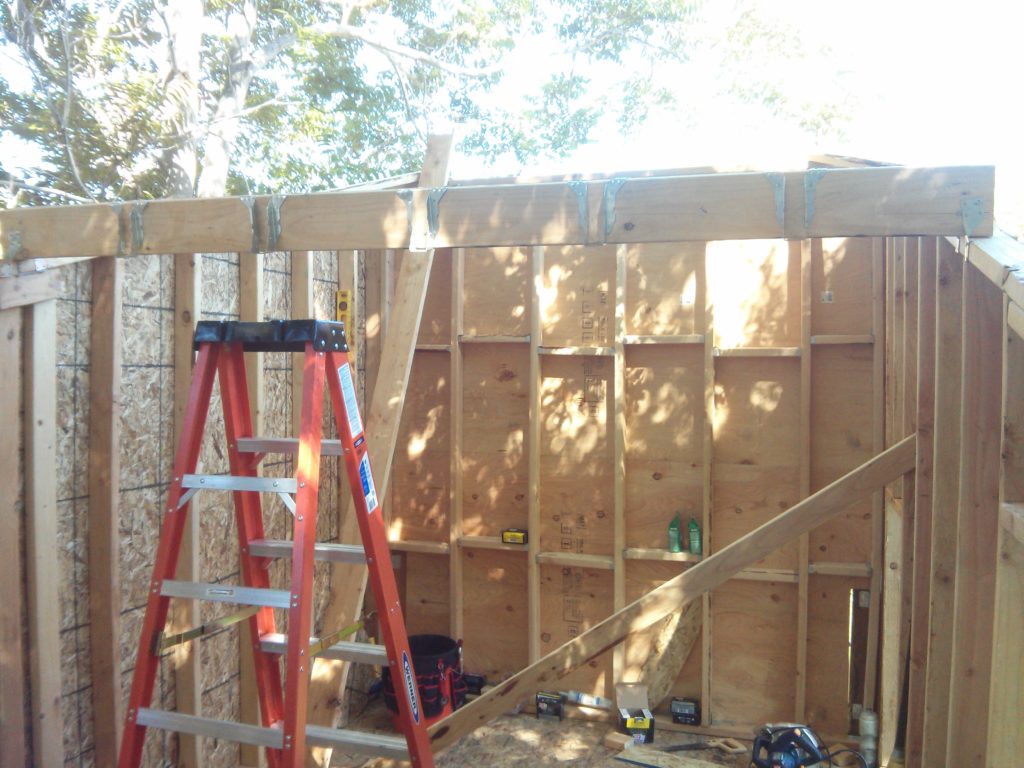
My first step was to build the center support that I would be using for the roof. I nailed two 8ft 2×6’s together to make it. I put joist hangers on both sides, and then set it on the top plates of the side walls using hurricane clips to hold it in place. If you notice in the picture, the support doesn’t go all the way to the end of the top plate. The plan is to rest the final ceiling joists on each side on the top plate. I don’t know if this conventional or not, but that’s what this backyard handy man did. Also, had I planned it better, there would be a stud directly under each side of the support. I got it on one side, but I had to rig something else to get that on the other end.
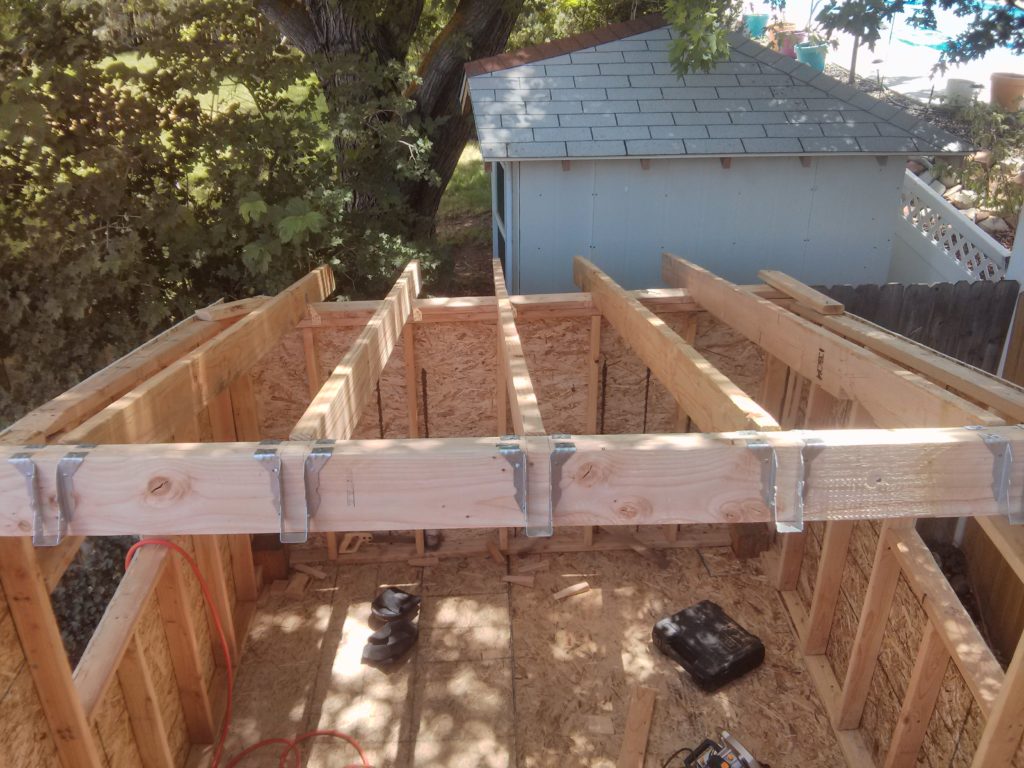
Next came getting my ceiling joists cut so I could place them. I used 10 ft 2×6’s. I wanted to make sure I had some overhang on the front and rear of the playhouse, especially on the front. I wasn’t sure how long I wanted it to be while I was planning it. It was something that I was just going to have to be able to see to make a final decision. This made it more convenient for me to do this rather than commit to more expensive longer 2×6’s. Since I live in an area of the country that gets lots of snow, I thought it would help give the roof more strength by putting this support in the middle.
The tough part was figuring out how to make the cuts where the joist hung over the wall. Since I already had roof pitch in mind and two walls that were already at that angle, I couldn’t just knock out some chunk of wood and hope for the best. This was probably my best use of geometry since high school. Like much of the things I had to learn for this project, I consulted the Internet, and found a great Youtube video explaining how to use a speed square to draw out the cuts needed for ceiling joists. It took a couple of tries and lots of head scratching, but I finally figured out how to get the cuts I wanted.
After all the ceiling joists were placed, I put a 2×4 in the middle under the center support to give it more strength in the middle of the ceiling. That 2×4 was placed on top of another 2×4 that was laid down on the floor. This will help distribute weight that may come from the roof down onto the floor joists.
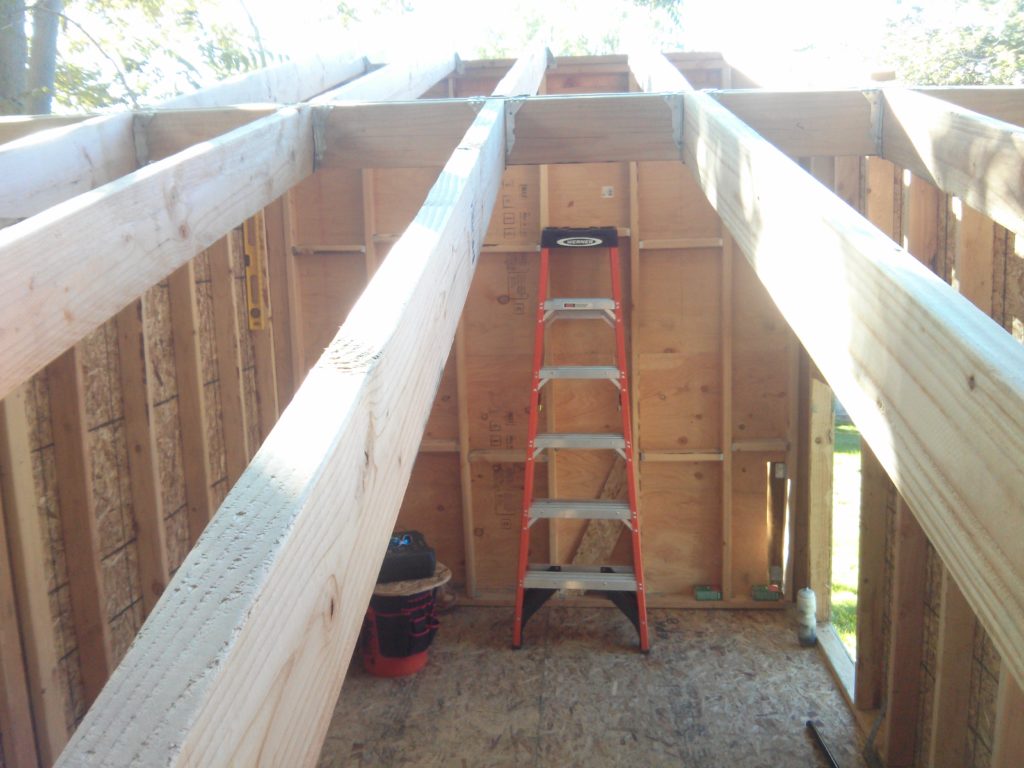
Once I had all of the joists placed, I began putting the OSB on for the roof. I had measured before I placed the final wall to make sure I could get an entire 4×8 ft sheet of plywood/OSB through the door. From there I just had to man handle them though the joists and onto the roof. I got some of those little metal spacers that go in between the sheets when you place them. Again, something I learned from volunteering with Habitat for Humanity that I would not have known about on my own. I didn’t have supports coming out from the building for an overhang, so I just had the OSB extend out over the wall for my overhang. I also left an opening for my skylight which just so happened to double as my roof access during construction.
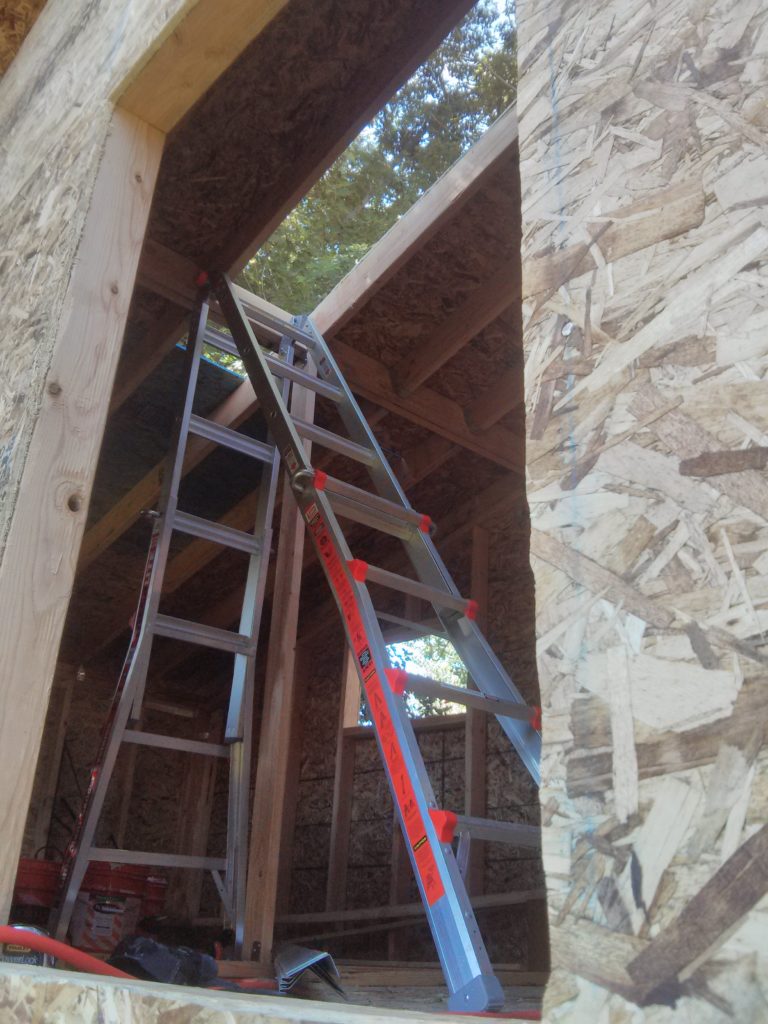
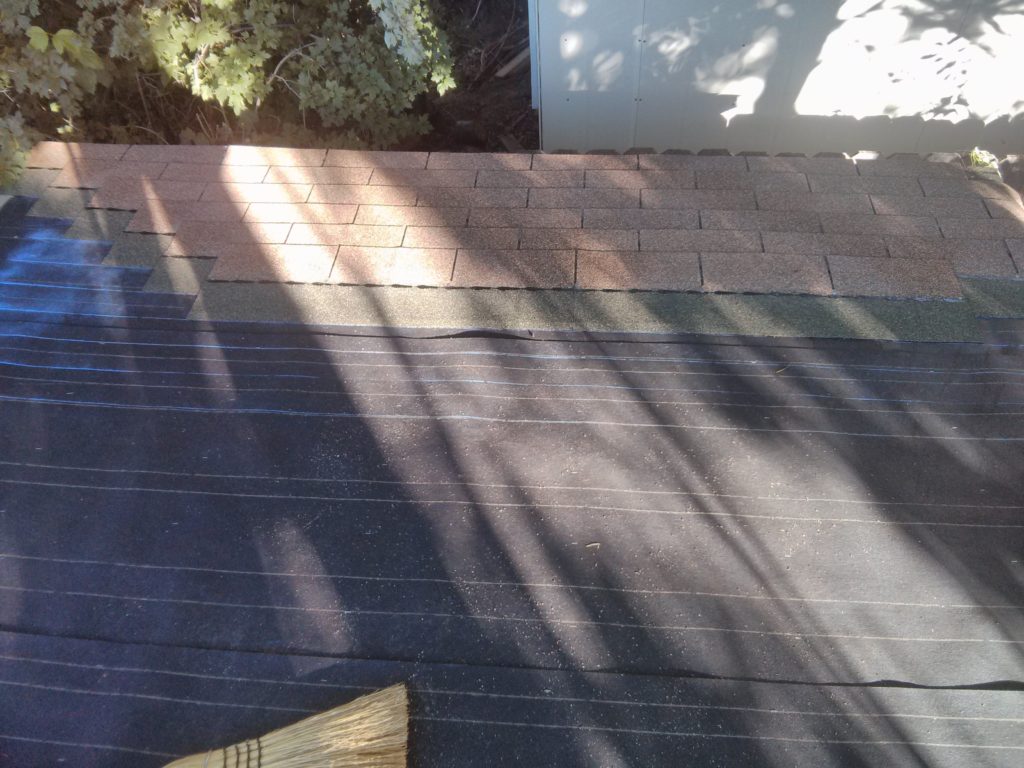
Once all the OSB was secured to the ceiling joists, I began the process of roofing. This was something I had never done before, so once I again I consulted the all knowing Internet to find a Youtube video on how to do it. I started with putting on the felt paper. I then put drip edge around the whole border of the roof. Once that was completed, I started shingling. That was a bit tedious. Mainly because I wasn’t well experienced in it. Lots of measuring, cutting, and chalk lines. Its one of those things that if you don’t make sure things are lined up, it will just get worse the farther along you go. Shingling around the skylight made it more challenging than just doing a plain roof. I put flashing on the area around the skylight.

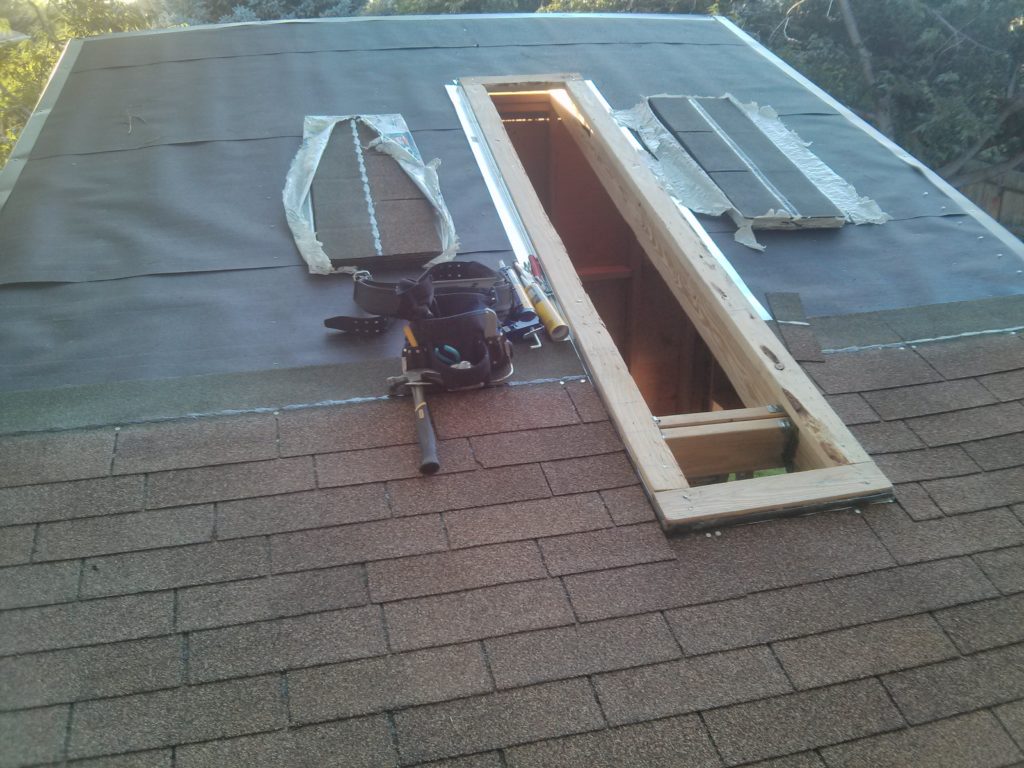
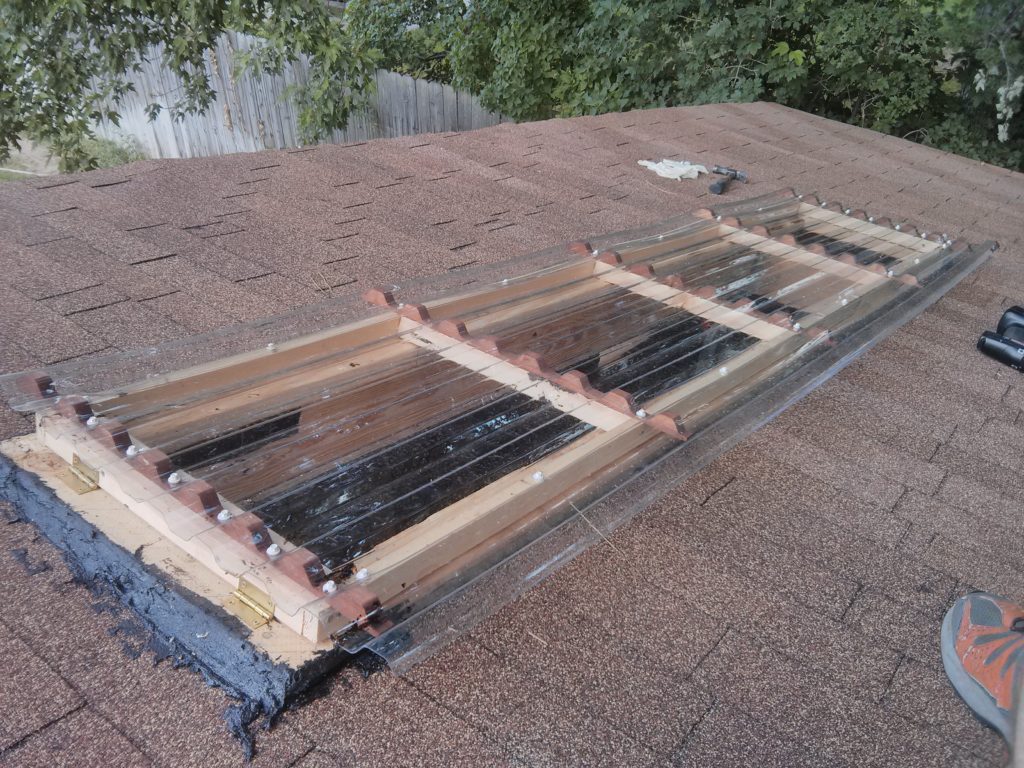
After all of the roofing was completed, I began working on the enclosure for the skylight. I had bought some clear corrugated plastic at the local home improvement store. I also bought the wavy wooden strips that go with that design to use for supporting the skylight. With snow in the winter, I didn’t want to rely on it holding up without some support in the middle of the area. I placed hinges on the top side of the skylight so that I could open and close it. Someday, I may come up with a mechanism for the kids to be able to open and close it to improve ventilation. But for now, I just have a scrap piece of lumber to prop it open.
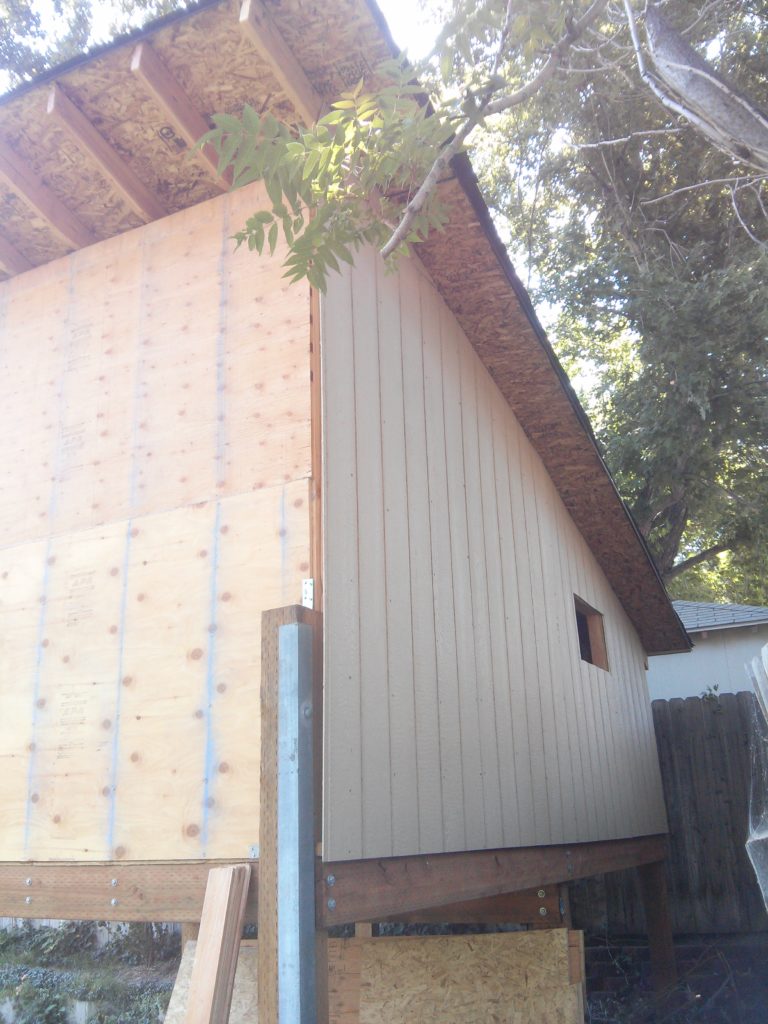
At this point, major construction of the exterior was done. Next I decided to buy some Smartside panels for the exterior. The OSB isn’t really mean to be exposed to the elements. It is my hope that this will help extend the life of the playhouse. The nice thing about it is that it comes with primer already on it. The sheets are cut so that you can easily line them up and should line up on your studs.
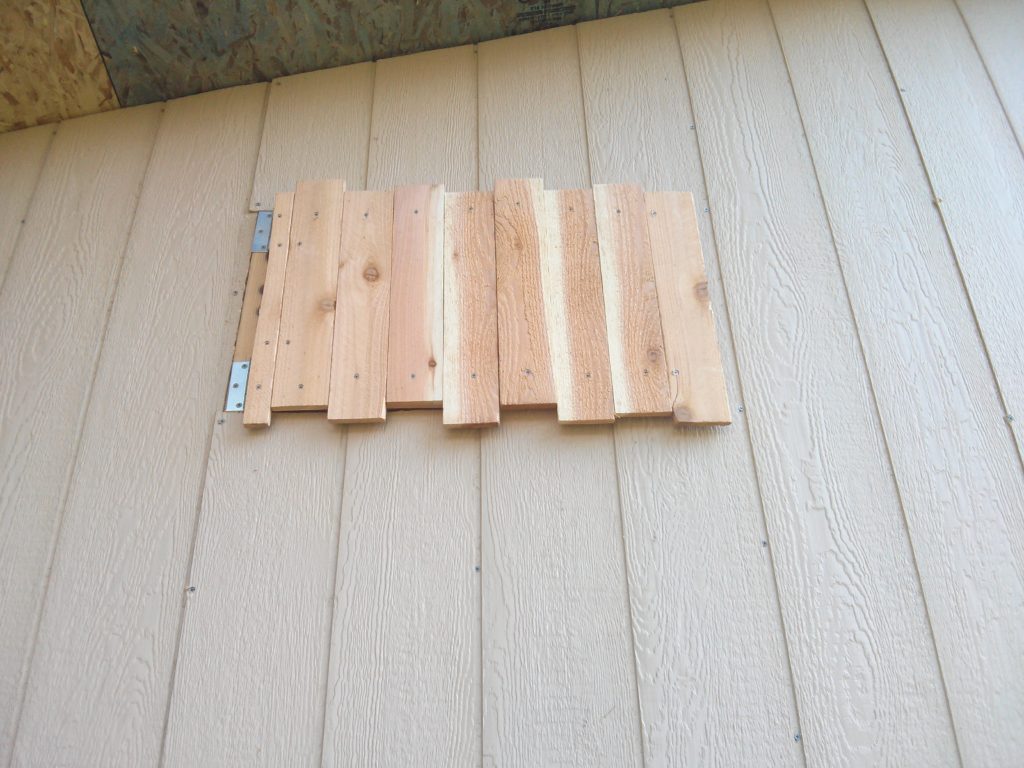
I didn’t want to leave the windows opened as that would allow insects easy entry, so I came up with an idea on how to make some shutters. I bought some fencing material at the local home improvement store. It was a rough cut looking material. I lined up each slat so that each one was alternating one high, one low. I then screwed them into wood that was behind it. I put on some hinges and a handle. I like the way they look. It has an amateurish look to it that you might expect from a kid.
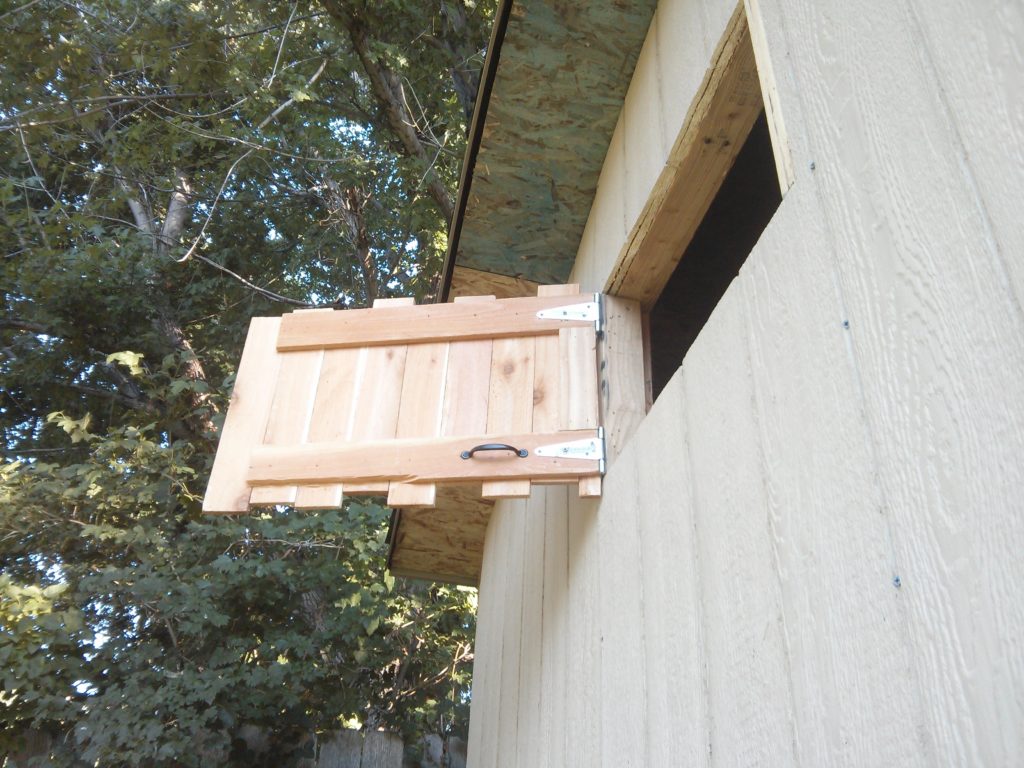
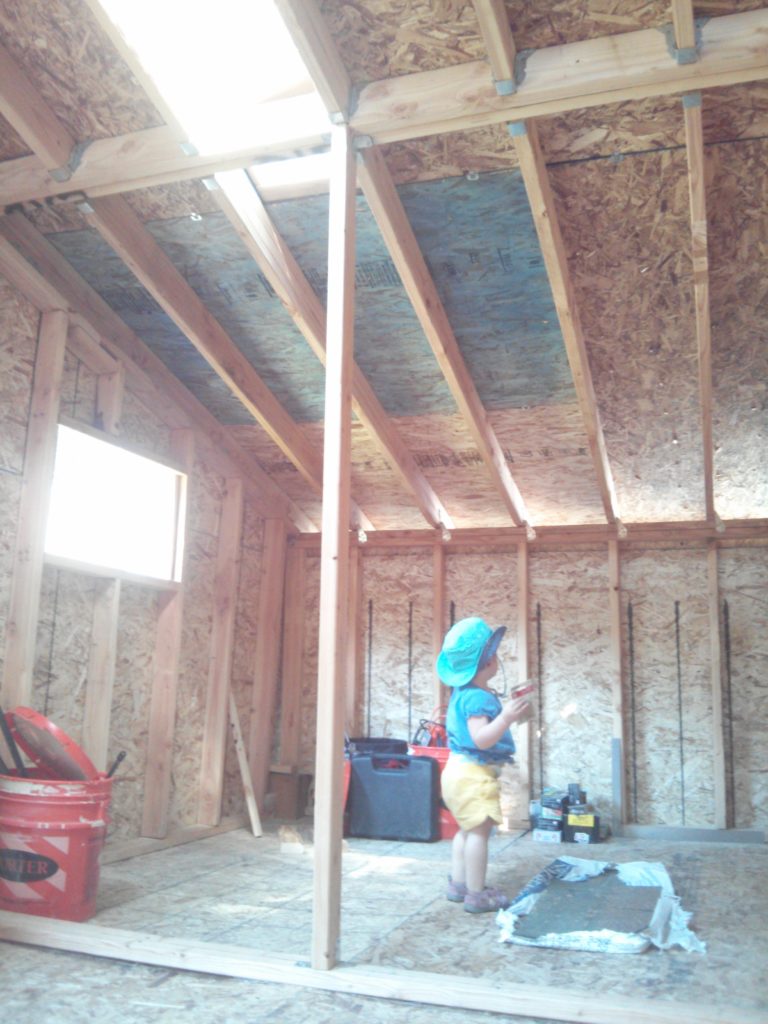
After the shutters were placed on both walls, I turned to doing some work on the inside. I had my daughter give her first walk through inspection. You can see the OSB on the floor was already warping. I’m a big guy, so I’m sure that didn’t help. You can also see the center support I placed for the roof.
Because I didn’t like how the OSB wasn’t holding up, I decided to put another floor on top of the OSB. I found some 1×4’s at the local home improvement store. I bought a big load of them and installed them as the flooring. I guess you can say my kid’s playhouse has hardwood flooring now.
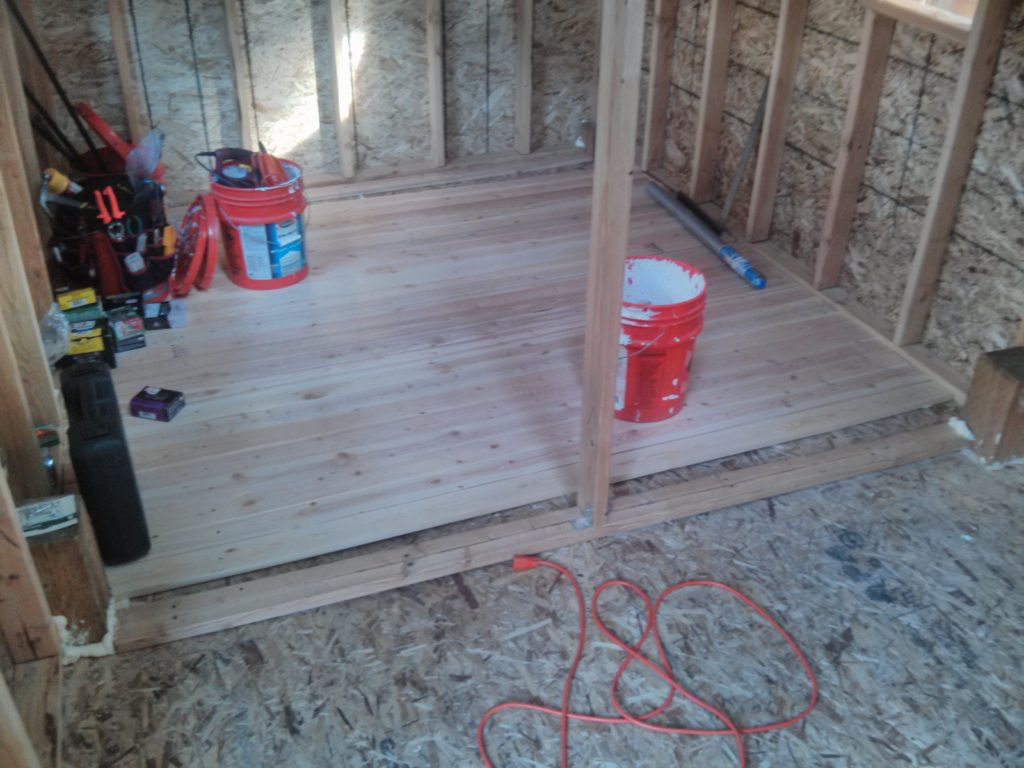
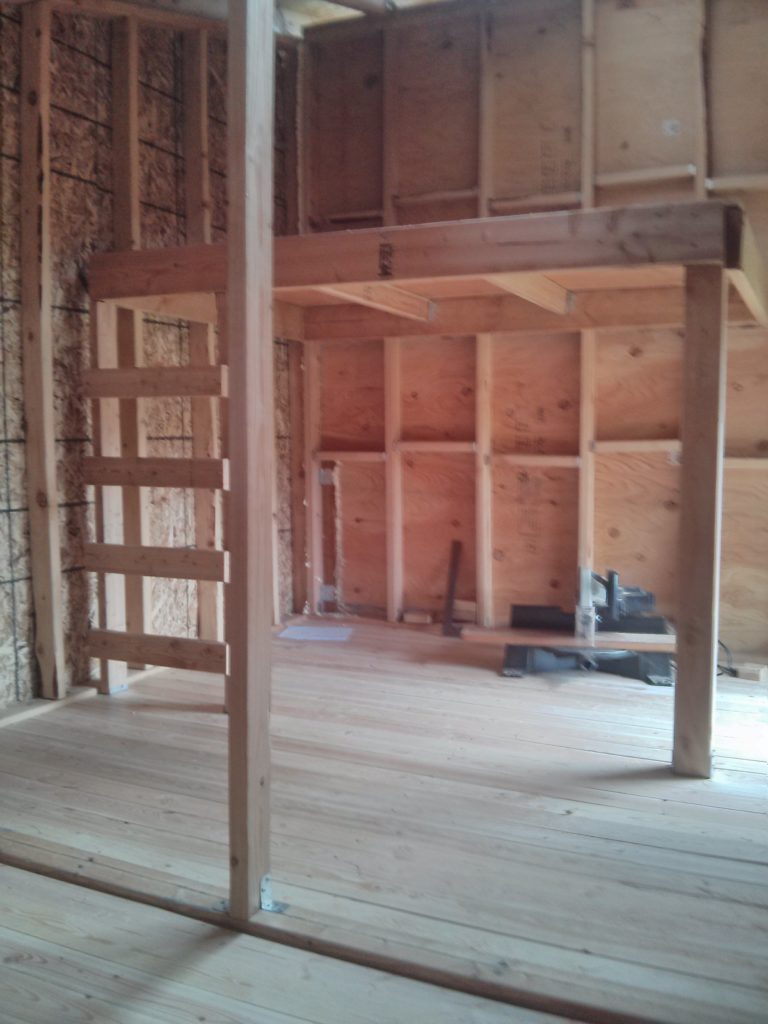
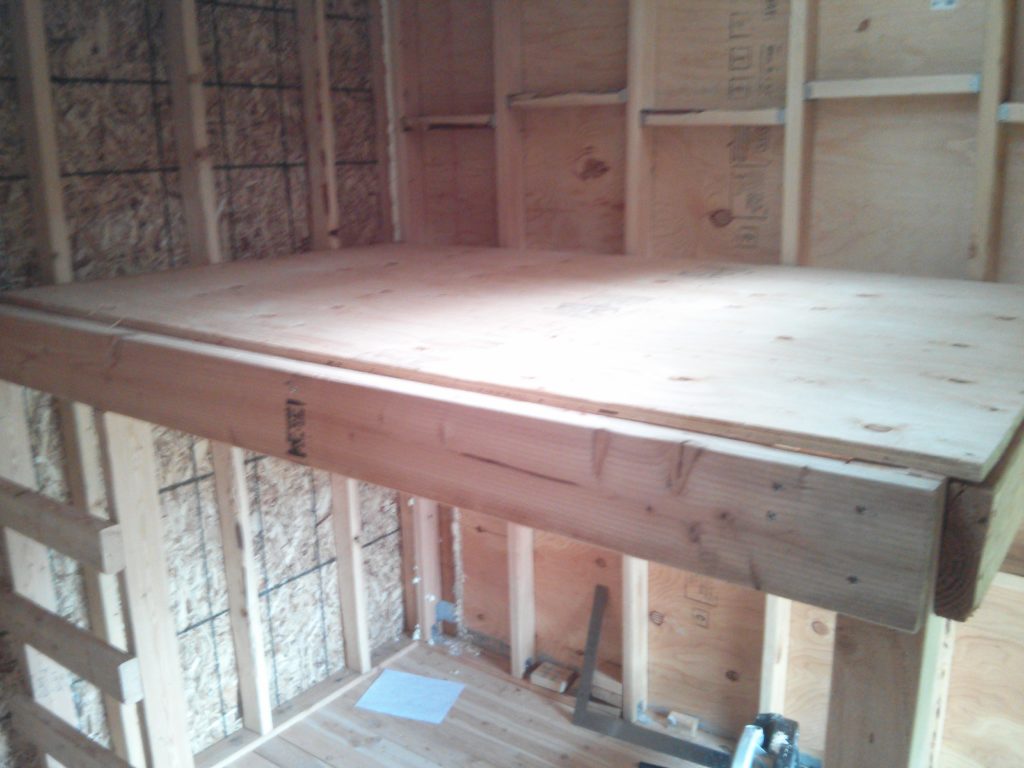
Once the new floor was in, I could do some the inside work that I had planned. I wanted to put in a loft to make use of the extra space that was in there since one wall was 8 feet high and my kids didn’t need that much ceiling height. I built a box that was supported on two sides by wall studs and on the opposite corner I placed a 4×4 post. I put a sheet of plywood on top of that. I then built a ladder on the side of it for access. This doubles the useable area on that side of the playhouse. It can also double as a bed should the kids choose to sleep out there some time. The downside to this is that an adult has to maneuver around the loft as you run into it once you enter the door. It is taller than the door though.
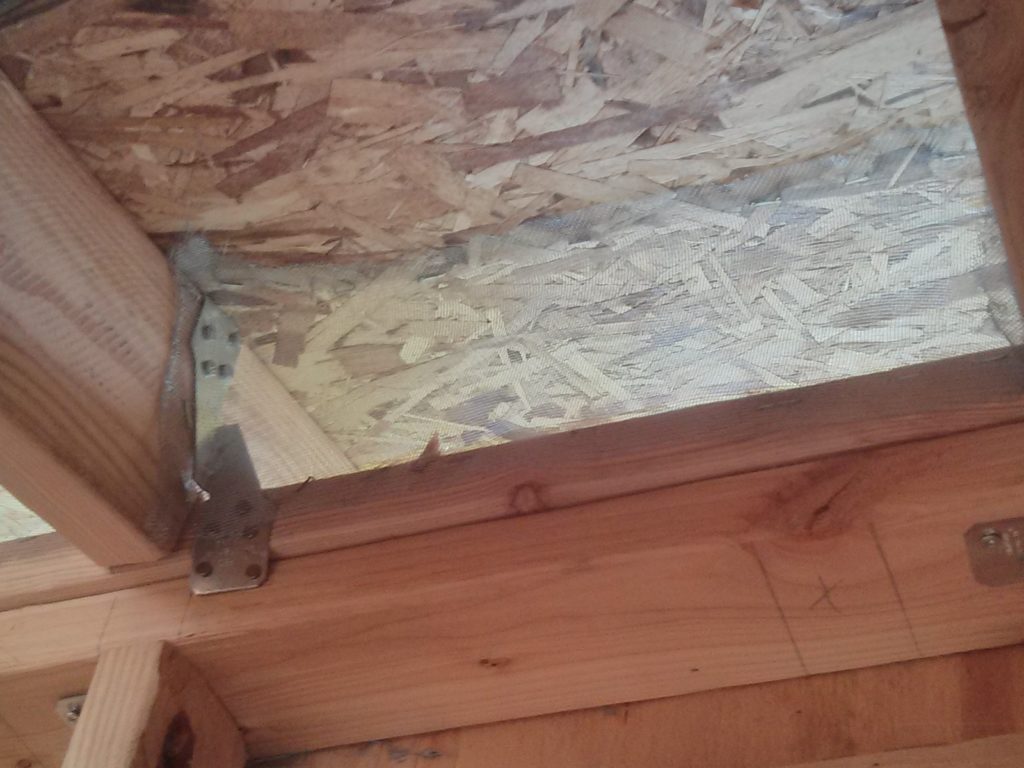
Another idea I got from the Modfrugal blog was putting screening in between the ceiling joists where there is a gap between where the wall and the ceiling are. I just bought some mosquito net screen at the local home improvement store. I then used the staple gun to put in place. It was a bit awkward getting it in the holes. The Modfrugal site has a neater finish to theirs by placing some trim around the edges, but I decided it was more work than I wanted to do.
Next was to build a little furniture. Something better suit for a finish carpenter than a rough carpenter (which I don’t consider myself to be even that level). I wanted a bed in the playhouse so my kids or a kid could sleep in there if they wanted to. I used the left over from the 4×4 post that I used on the loft, some 2×6’s for the frame, and a sheet of plywood for the top. I wasn’t quite sure what the dimensions would be, so I had to go searching for some mattress sizes to figure out how big a cot should be. We plan to order a couple of mattresses from that site to put in the playhouse. They are similar to the mattress foamies that we used at Philmont in Basecamp, so I hope they will be durable and outdoor resistant.
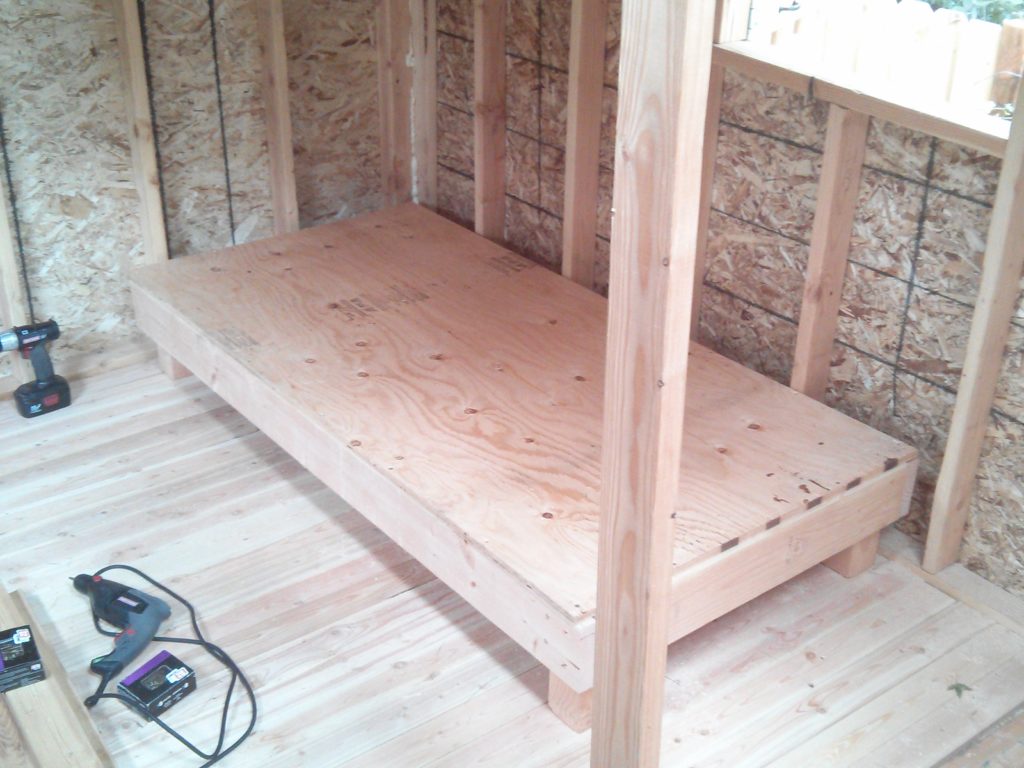
I also built a rickety little table. I’m not real proud of it, so I don’t plan to put any pictures of it here. I also later took some of the left over Smartsiding scraps to cover up the studs in parts of the interior. Two of those areas we bought some chalkboard paint at the local home improvement store so our kids could have a chalkboard to draw on in there. Along with finishing up the inside, I bought some cans of expandable foam to fill in the gaps where my amateurish construction skills didn’t allow all the pieces to come together like I had hoped.
The door I built similar to the shudders, but I used the leftover 1×4’s I had bought for the floor. All this time I had been using a metal ladder to get in and out of the playhouse. It was time to build a proper wooden ladder. I used pressure treated lumber for this. The rails were 2×6’s and the treads were 2×4’s. Figuring out the angles for the top and bottom cuts on the rails took some geometry review, but I managed to put Mrs. Tinnin’s high school geometry to use.
Once I had done everything I had planned for this phase of the project, I looked to finishing the outside. Half of the area under the treehouse I boxed off with pressure treated 2×6’s to make a sand box. I bought a truck load of sand from a local nursery and hauled it back there. The other half of the area under the playhouse I decided to make a patio kind of area. We wanted to be able to spend time with our kids while we were out there, so I bought some paver stones from the local home improvement store and made a patio area. We put a couple of lawn chairs out there so we can sit in the shade while our kids play in the sandbox.
Towards the end of the project the painting happened. My wife helped me with that because she knows how much I hate painting. I used a brown stain on the shutters and door as well as the area on the back corners. Unfortunately the walls in the back didn’t meet up as square as I had hoped. I filled in the gaps with expanding foam and caulk. I covered it up with some rough fencing material I bought at the local home improvement store. I also stained this the same color as the shutters and door. We painted the main walls of the playhouse with some exterior paint from the local home improvement store. We went with green because we wanted it to blend in with the tree and vegetation that were around it. I don’t think that the neighbors wanted something stick out like a sore thumb. Hopefully this helps to make it blend in more than stand out.
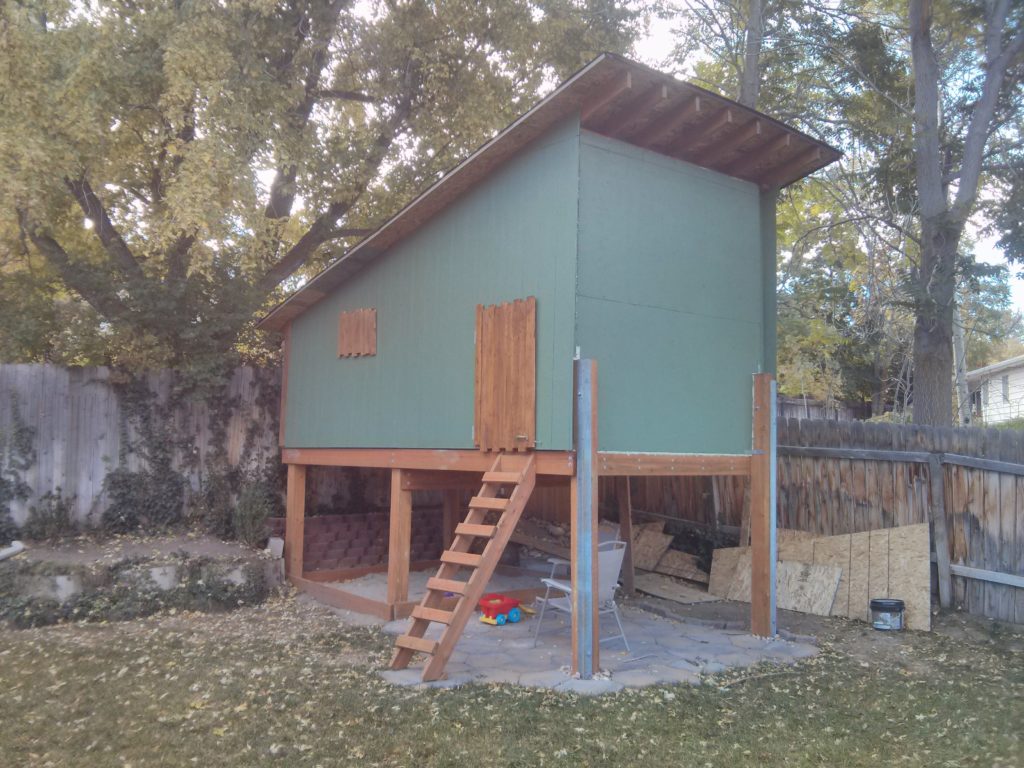
Below is a video tour of the finished playhouse. Building a playhouse has been a dream of mine for quite a while now. It was very satisfying realizing that I was capable of being able to make this. Its the biggest DIY project I’ve ever tackled. Now I hope my kids enjoy it or else it will just be a nice place for insects to live.